
Chapter 1 /6 · The Pro Reference
Cutting a Common Rafter
The cut every framer learns first. Pivot point, plumb cut, length along the top edge: laid out with a Speed® Square in three minutes per rafter.
After reading
Lay out a common rafter from rise + run + length, with the right plumb cut at the ridge and the right tail cut at the eave.
What the cut is doing
A common rafter runs at a right angle from the wall plate to the ridge of the roof. It forms the diagonal leg of a right triangle: the rise of the roof is the vertical leg, the run is the horizontal leg, the rafter is the hypotenuse. Get the rise and the run right and the rafter length follows from the table.
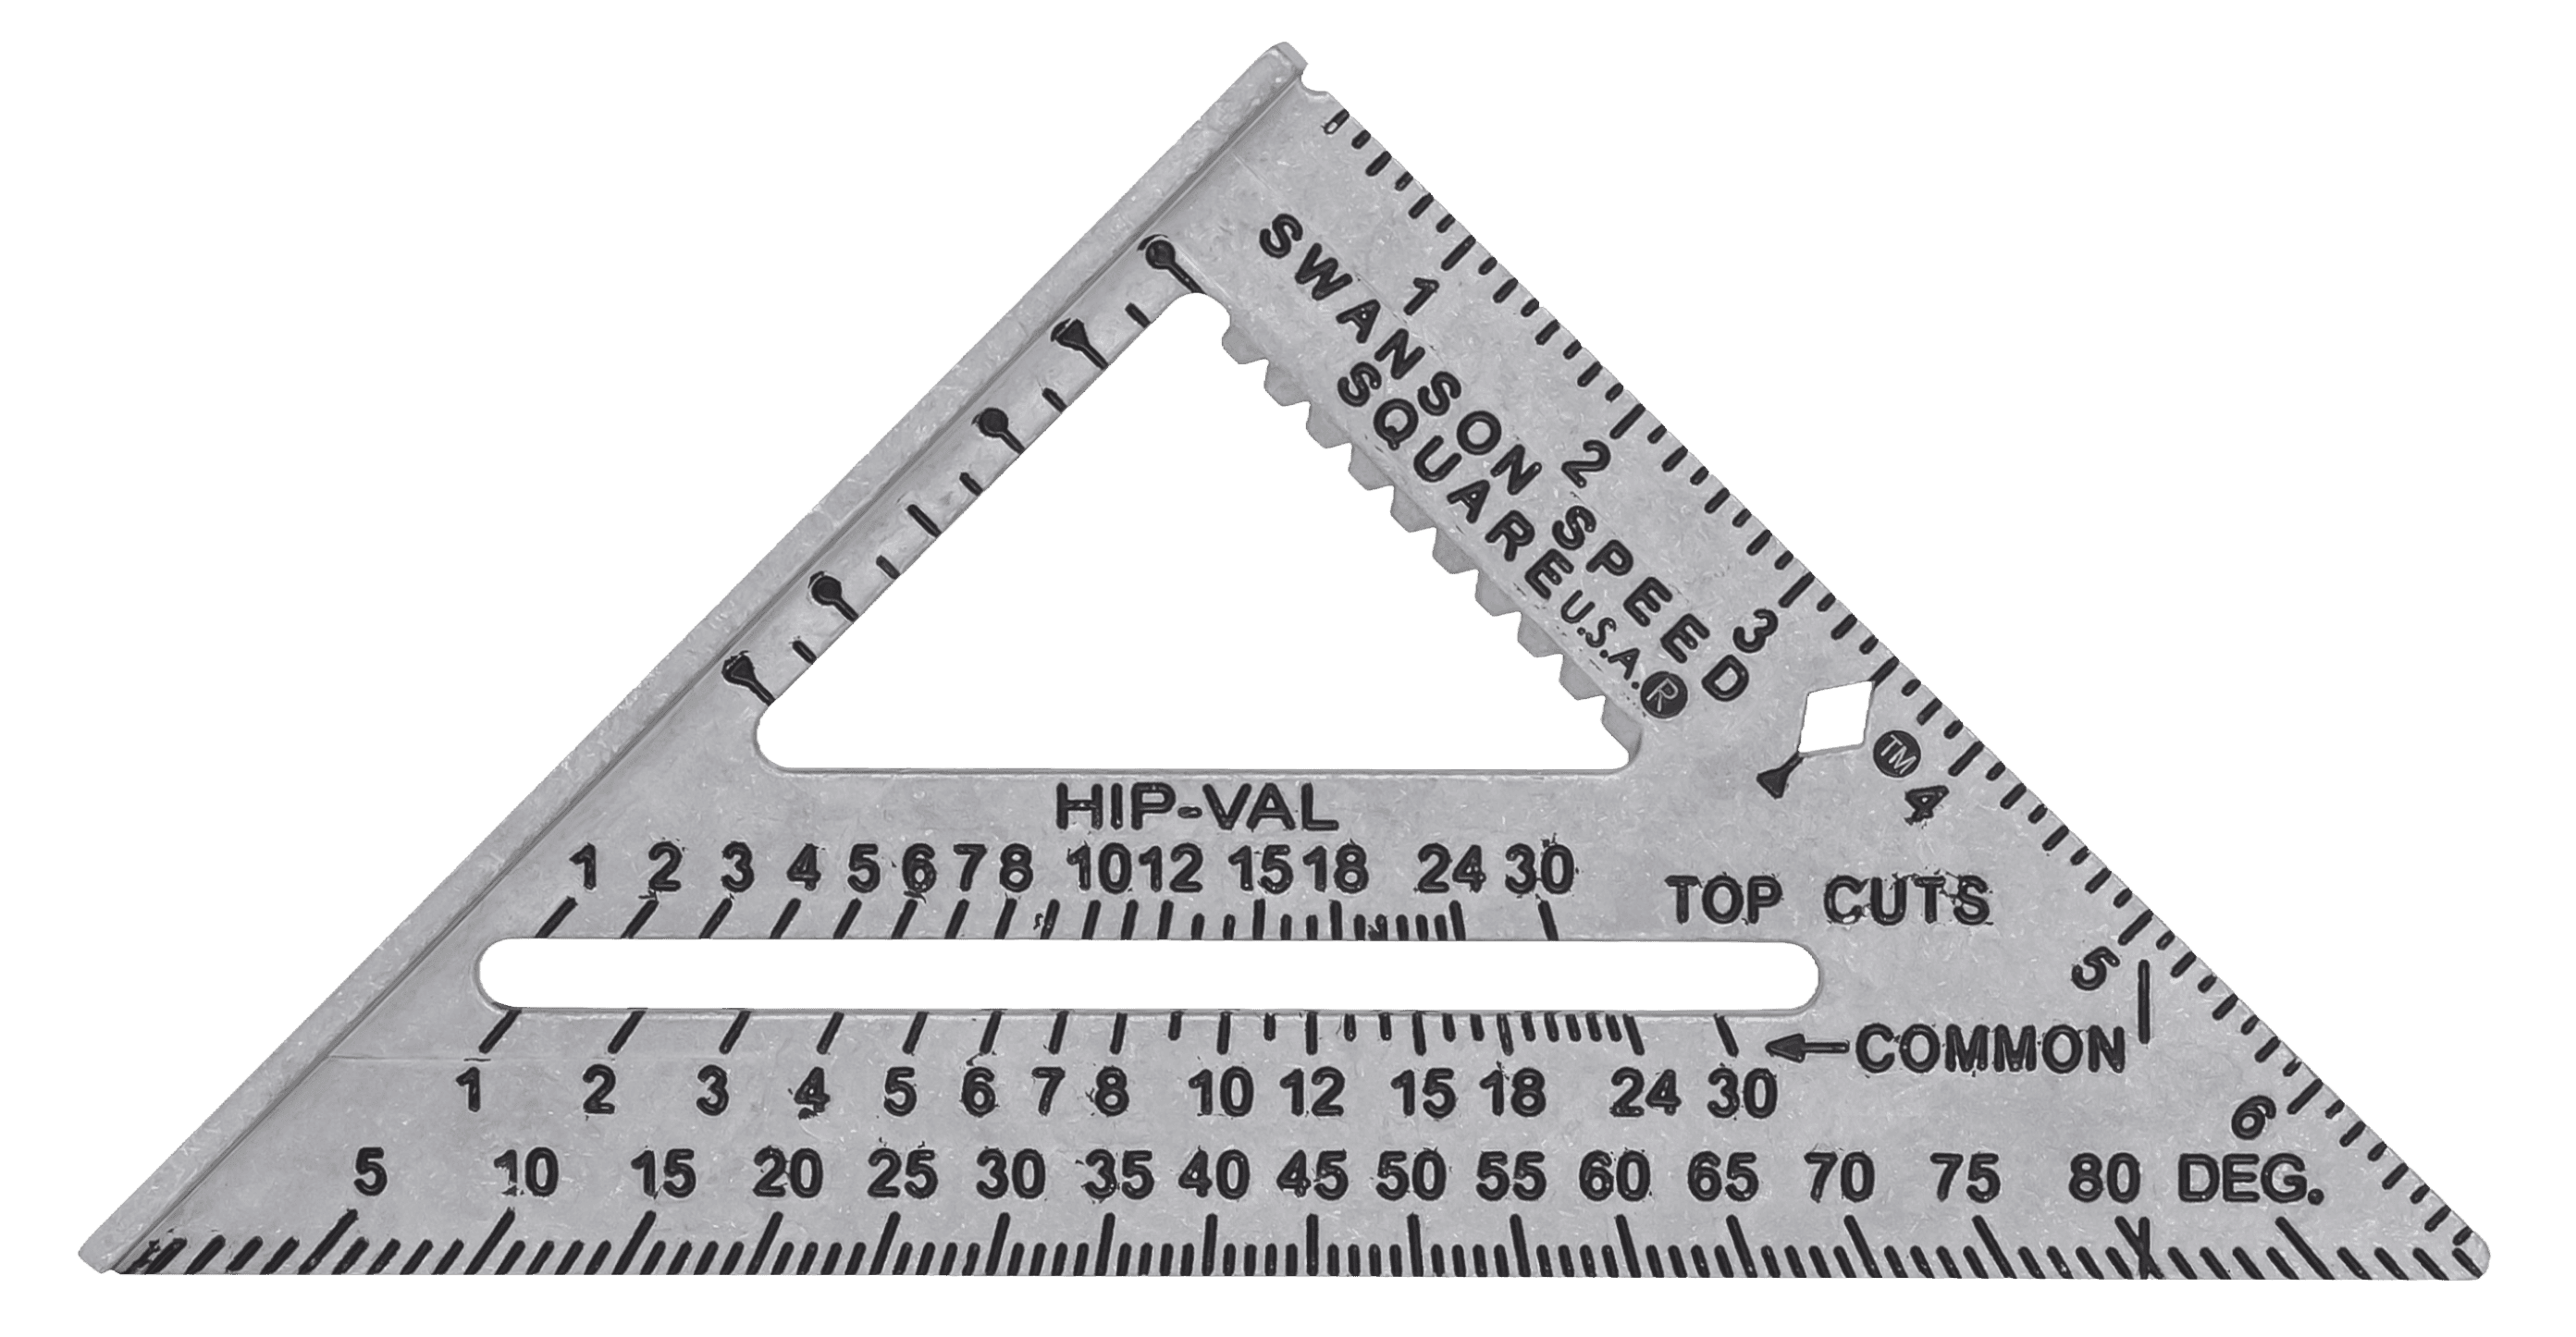
"ONE-NUMBER℠ METHOD:" Helping Workmen Make Correct Angle Cuts.
Common rafter, geometry
Figure 01The math, live
Hover any term · the geometry highlights
The rafter length per foot of run. Multiply by your span in feet to get the cut length.
Pitch
5 / 12
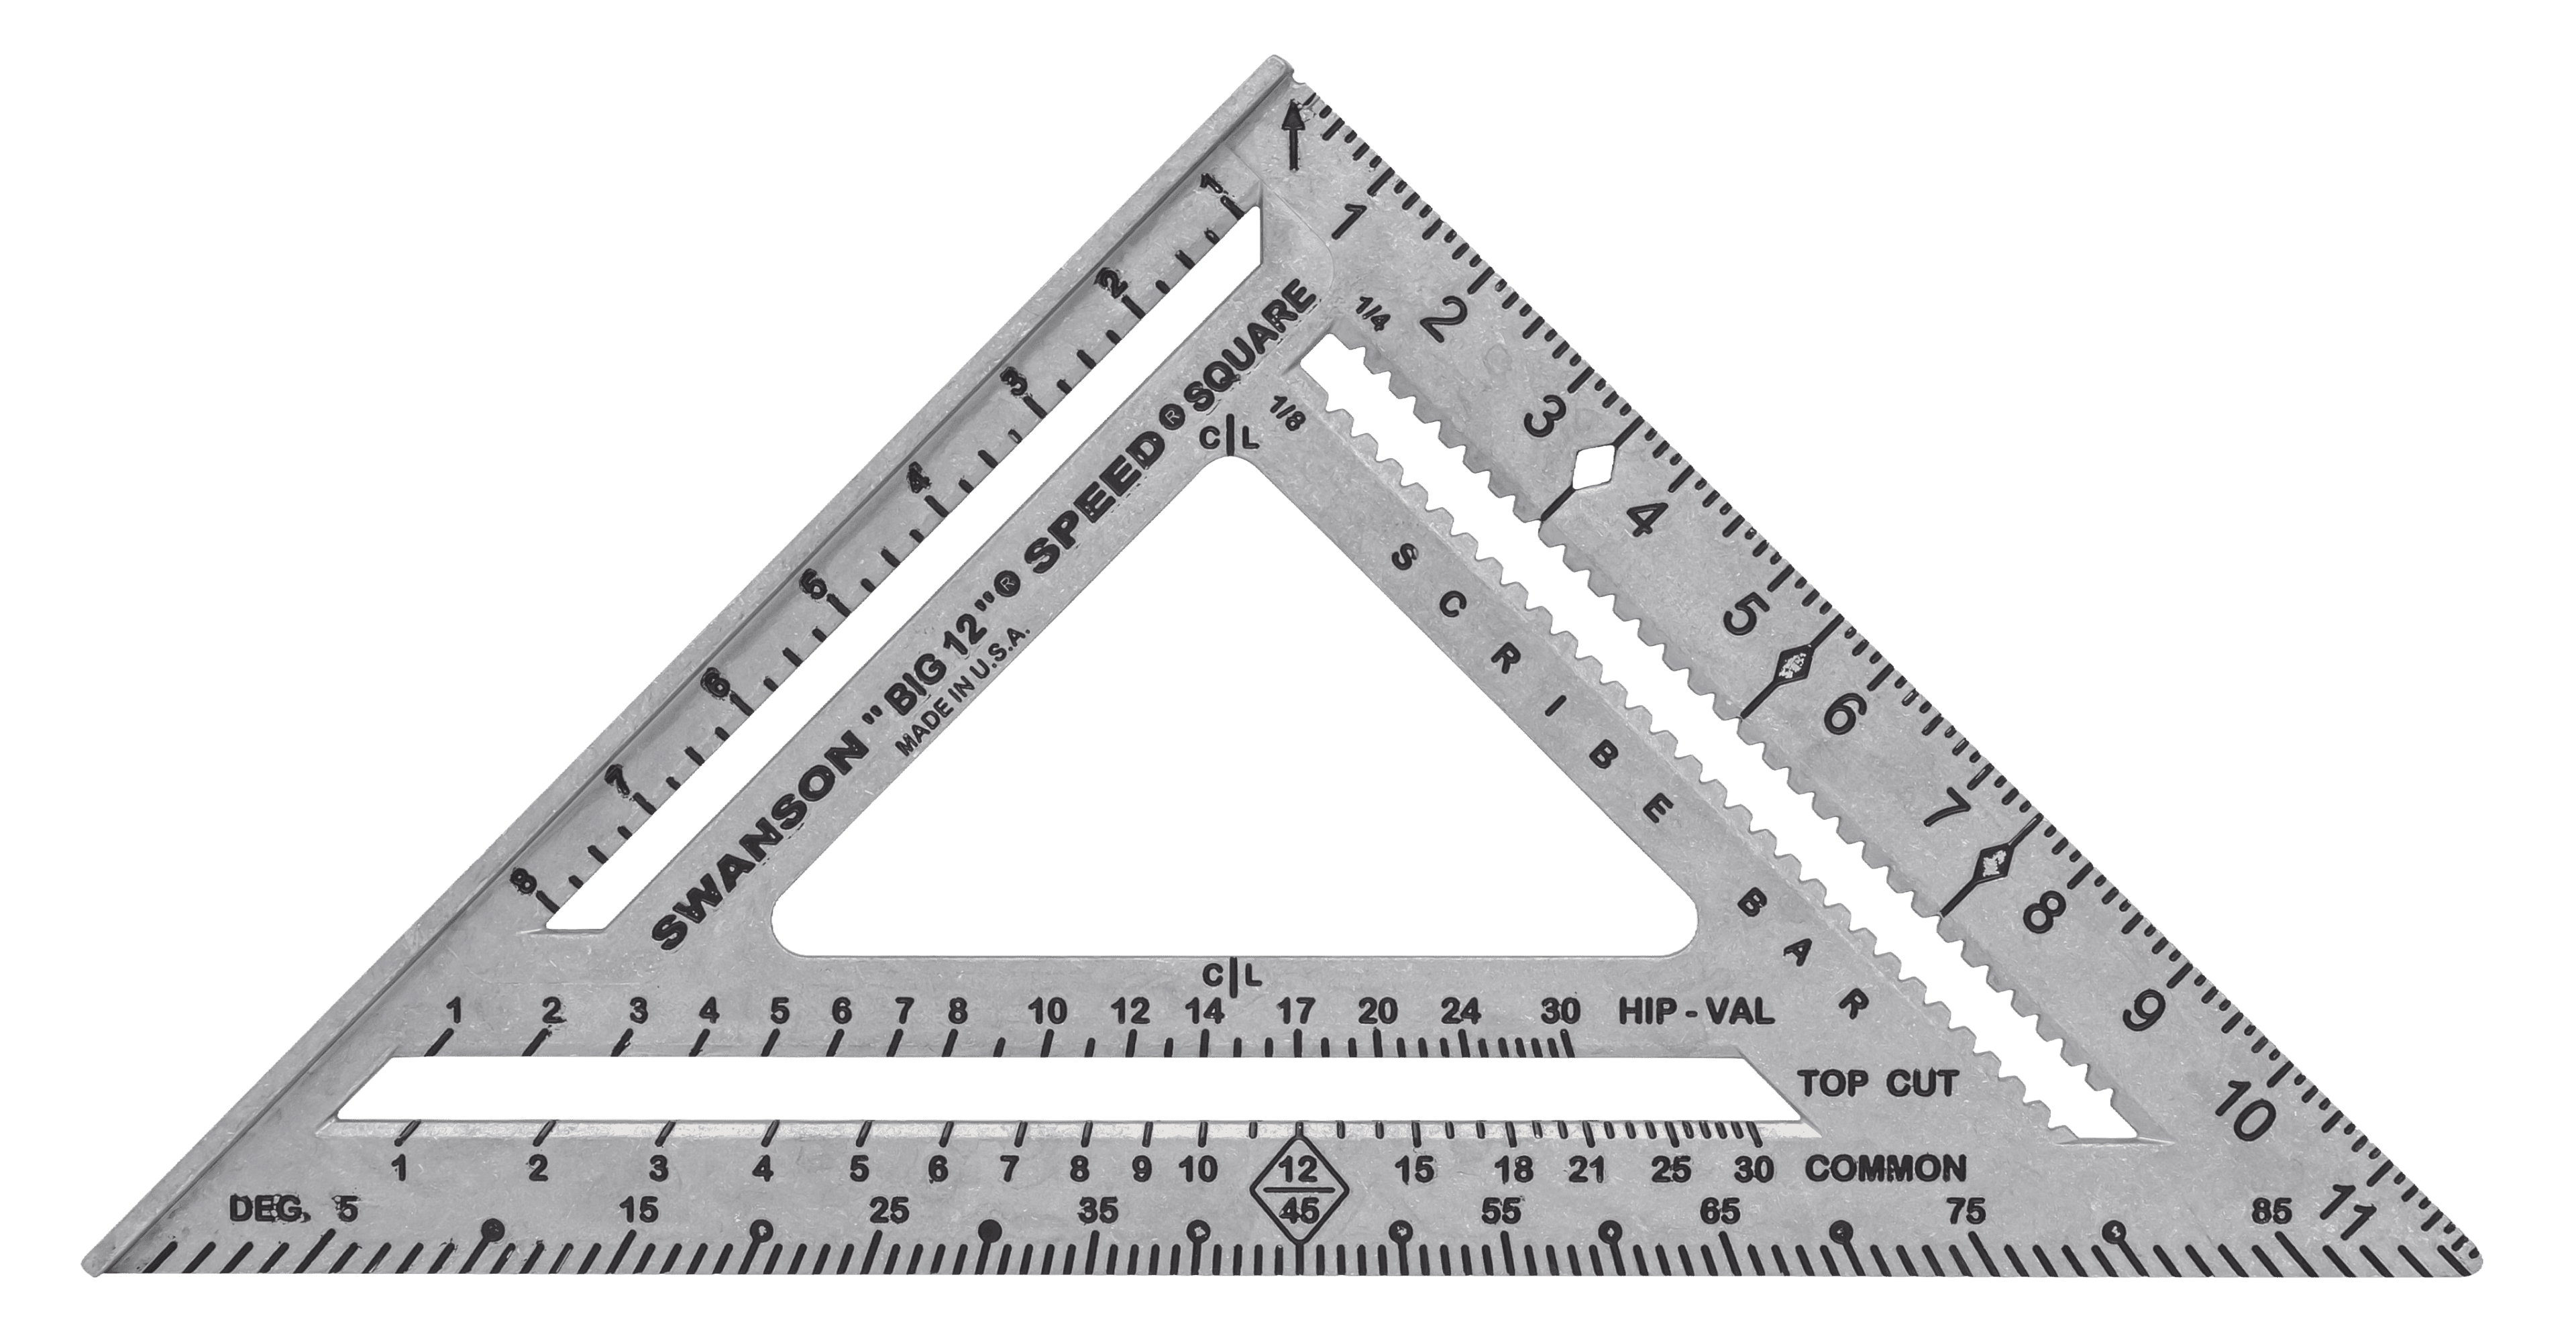
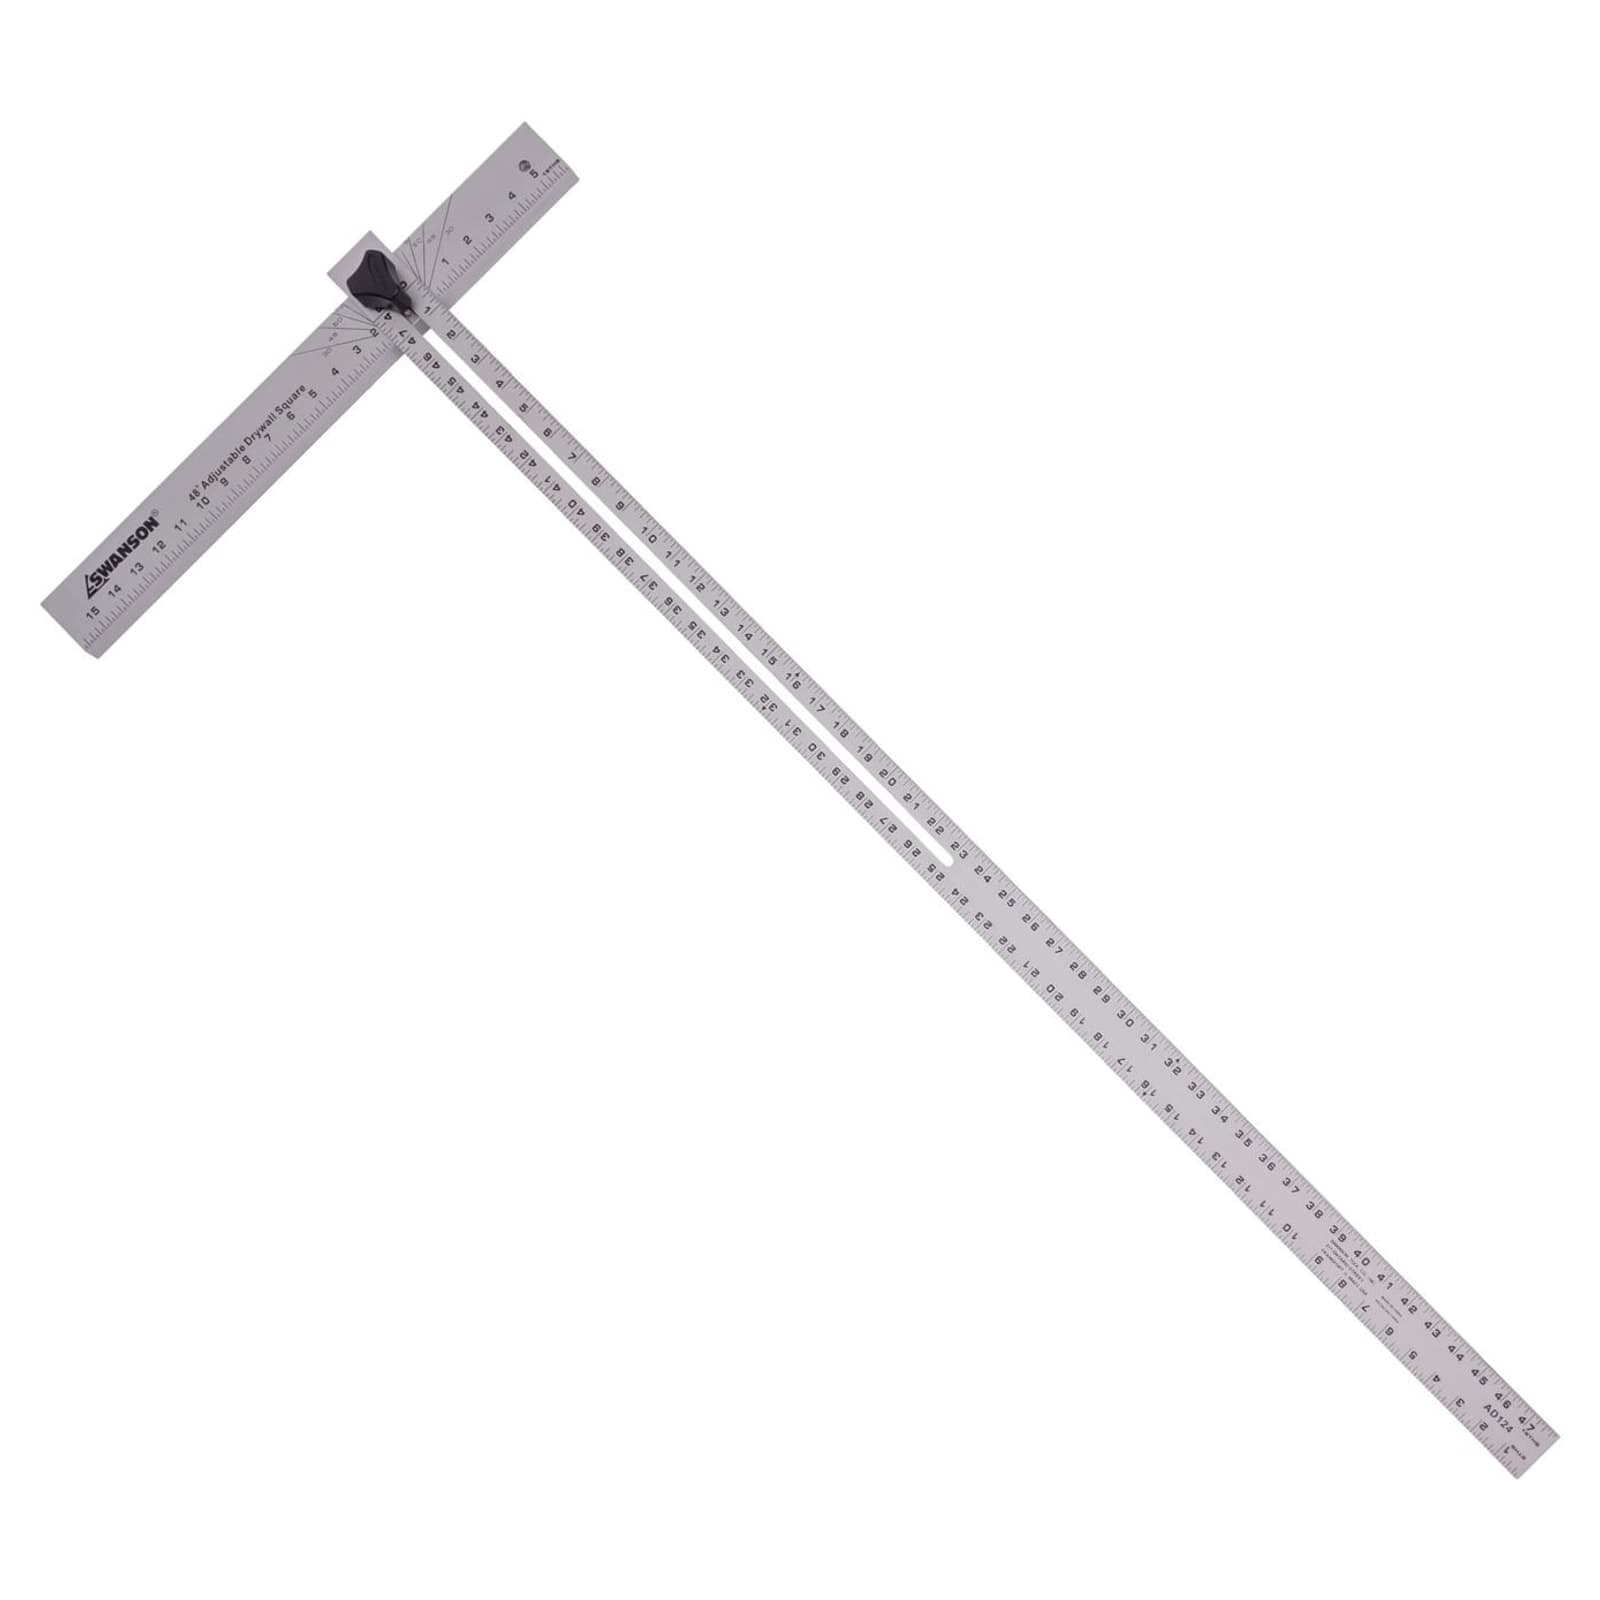
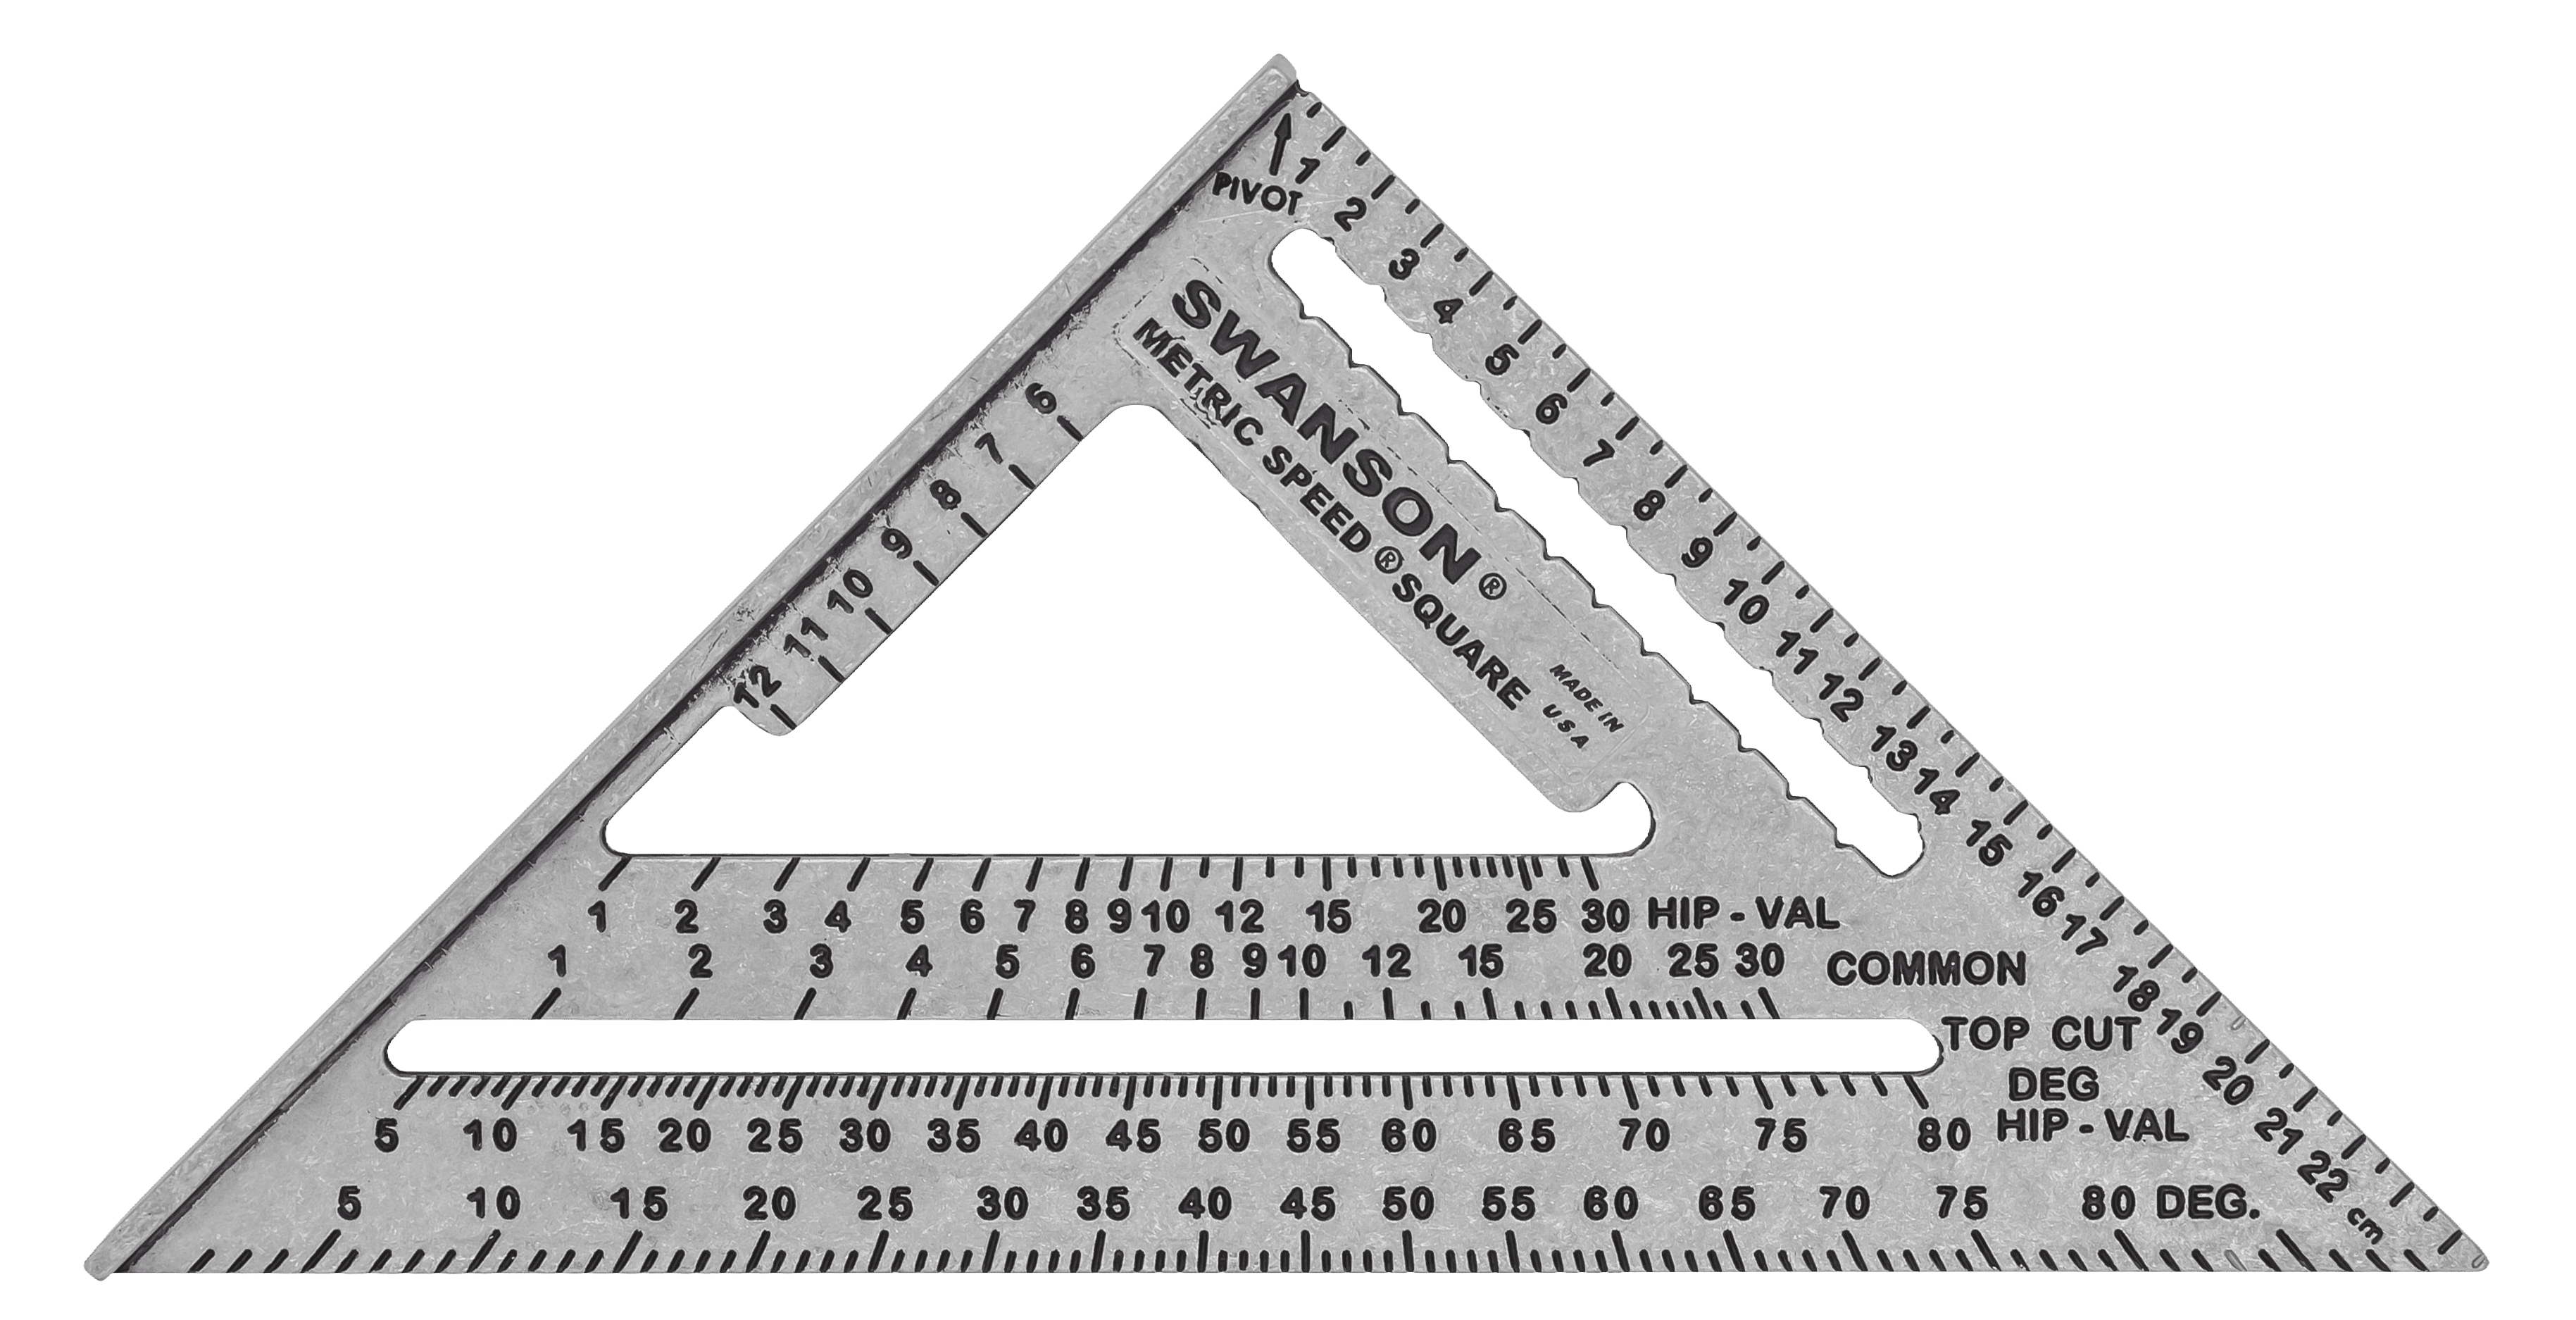
THE SCALE, 0-90 DEGREES, ACROSS BOTTOM (LONG LEG) OF SQUARE ALLOWS USER TO MARK AND MEASURE HIS WORK IN DEGREES. EACH HEAVY BLOCK LINE IS 1° WIDE. EACH SPACE IS 2° WIDE. THIS MAKES IT MUCH EASIER FOR THE EYE TO PICK OUT A LOCATION ON THE SCALE.
FRAMING A ROOF using a Swanson Speed® square, "Big 12®"® square or Speedlite®® square, although they differ in size (7",8",12") as well as some of their other features, requires the use of only one number, the inch rise per 12 inches of horizontal rafter run. The "ONE-NUMBER℠ METHOD" was developed by SWANSON TOOL CO., INC. To simplify roof framing.
The diagram shows square set for 5" rise of common rafter. For 5" rise of the hip or valley, pivot square to #5 on HIP-VAL scale. Always line up the rise number from the same edge of material as you pivot square. The mark along top edge of square will be the PLUMB LINE. Keep pivot point tight against material. You can also read the roof angle on degree scale - 5" rise is a 22.5° angle.
The layout, in five moves
The Speed® Square method has not changed since 1925. The instructions below are the modern-edition wording; the heritage reading at the bottom of this page shows them in the original prose.
FIG. 8 COMMON RAFTER
Formula
Formula for calculating rafter length from run and rise.
Rafter Length equals the square root of (RUN squared plus RISE squared).
\text{RAFTER LENGTH} = \sqrt{\text{RUN}^2 + \text{RISE}^2}THE COMMON RAFTER
In laying out any rafter, if the lumber is not straight, put the crown or high side up as you lay out your cuts. At top end of rafter draw a plumb line for your roof rise. This gives the plumb cut to fit against the ridge. To find length look under "Using Rafter Length Tables." Measure the rafter length along top edge of rafter. Mark another plumb cut same as above. This line represents outside wall of the building, (the same point from which you measured the width of the building) and would be the heel plumb line. Add length for a tail or eave to the rafter lengths given in the.xample for figuring tail lengths under the Hip Rafter layout. Mark another plumb cut at end of tail for the Fascia Board to nail against. Figs. 8 & 19 shows a horizontal (plancher) cut to provide flat nailing surface for eave construction. Before you cut the rafter, move the top plumb cut line toward tail of rafter an amount equal to 1/2 the thickness of the ridge board. The tails of the rafters may be cut on the ground, or wait until rafters are all in place and mark the ends to a line and cut - whatever is easiest. To lay out the birdsmouth (cut out for top plate on wall) or 9b. Use first rafter cut as a pattern for the rest. Keep top edge of pattern flush with top edge of each new rafter laid out so that height above plate is uniform.
Find the rafter length
Look up the value for your pitch in the Common Rafter column, then multiply by your run in feet. The result is the rafter length in inches. The interactive solver below does the math.
Type your pitch and span. The rafter answers.
6/1226.6°
24ft
Common rafter length
13′ 5″ 1/16″
161.04″ per rafter · 13.42″ per ft of run × 12 ft of run
- Pitch
- 6/12
- Angle
- 26.6°
- Per ft of run
- 13.42″
Schematic geometry. Not to scale, true math, every pitch.
A century of the same numbers
The math has not moved since Albert printed it in 1925. Scrub the editions below to see how the typography evolved while every value stayed identical.
A century of the same table.
The rafter length math hasn't changed since Albert Swanson printed it in 1925. The typography modernized, the columns reflowed, the cover got new ink. But the numbers a framer cuts to today are the numbers from the first edition.
| Rise | Pitch | Common rafter (per ft of run) | Hip / Valley (per ft of run) |
|---|---|---|---|
| 1.00″ | 12.04″ | 17.00″ | |
| 6.00″ | 1/4 | 13.42″ | 18.00″ |
| 8.00″ | 1/3 | 14.42″ | 18.76″ |
| 12.00″ | 1/2 | 16.97″ | 20.78″ |
| 16.00″ | 2/3 | 20.00″ | 23.32″ |
| 24.00″ | Full | 26.83″ | 29.39″ |
Same numbers Albert Swanson printed in 1925.
Open the full 1925 TableRead it in the original voice
The composite above is the modern voice. The blocks below are the unedited heritage prose, sanitized of print-only references and presented in the original Blue Book's voice. The cuts are the same; the cadence is older.
COMMON RAFTER
COMMON RAFTER: One running at right angles (90°) from plate to ridge. The common rafter will form the diagonal leg (hypotenuse) of a 90° triangle, with the rise and run forming the 90° angle of the triangle.
The diagram also shows correct points from which to measure. Study them and remember the picture when you are on the job. Where the arrows show | Rafter Length |, these are the lines to measure from. When your lumber is not straight, always put the crown or high side up when laying out any rafter. When laying out rafter (lets assume 5" rise), start at top end of rafter. Lay square on face of rafter, with "T" bar of square down over the edge of rafter. Pivot square to where number 5 on common scale lines up with same edge of rafter as pivot point. Keep pivot point tight against edge of rafter. Start your mark at pivot point, marking along top edge of square. This gives the top plumb cut, to fit against ridge.
Measure the rafter length along top edge of rafter. Mark another plumb cut same as above. This line represents outside wall of the building. (The same point from which you measured the width of the building). Add whatever length you want for a tail or eave to the rafter lengths given in the. Mark at end of tail on rafter is plumb cut, same as one at top end of rafter. The tails of the rafters may be cut on
The ground, or wait until rafters are all in place and mark the ends to a line and cut,whatever is the easiest. To get the Bottom or Heel cut.
VALLEY RAFTER: One running diagonally from the plate to the ridge at the intersection of gable extension with main roof.
HIP RAFTER: One running diagonally from the plate to the ridge.
Since both hip and valley rafters run at a 45º angle to the common rafter, they both represent the diagonal or hypotenuse of a right triangle; the three sides being the hip, plate and common rafter, or the valley, ridge and common rafter. Therefore, the cuts and lengths apply equally to hip and valley rafters.
You will notice the square has a separate Hip-Val Scale which must be used for either of these two rafters. But always use the same number on Hip-Val scale as you used on the common rafter scale,the number representing inch rise. The reason for the separate Hip-Val scale is that the hip and valley rafters run at 45º to the common rafter, and therefore must be longer. In, the hip rafter has a horizontal run of 17" to rise 12", while the common rafter rises 12" in only 12" of horizontal run. This requires a different angle for the plumb cuts. In, square is held on rafter and pivoted in the same manner as with a common rafter, but using the Hip-Val scale. If building is out of square, one
Hip will be cut a little shorter, depending on how great the error is. Keep longer corner at top end of hip up even with top of ridge. Keep ridge and hips well propped up until roof boards are nailed. Watch that you don't put a bow in ridge or hip while nailing other rafters to them.
To find intersection points of center of hips on ridge, leave ridge about a foot too long at point where both hips intersect the ridge. Take a regular length common rafter (such as used on main roof). Set bottom cut over edge of plate and in line with ridge. Make sure your walls are straight. Place top end of common rafter along side of the ridge, bringing top point of common even with top of ridge. Mark across top of ridge at this point. This mark is the center line of the two intersecting hips. The common rafter used to get this intersection point would be placed in the same position as the one in that comes in line with the ridge and runs underneath the little dormer on the 20'0" wall side. This way you know the rise of the hips will be the same as the rise of the common rafter on main roof. Leave the bottom ends of the hips (eave end) a little short so they will not interfere with lining up the facia boards at the corner.
JACK RAFTERS: One which does not extend from plate to ridge. Hip Jack, one running from plate to hip at 90º to plate. Valley Jack, one running from ridge to valley at 90º to ridge. Cripple Jack, one which neither touches the ridge nor plate, but runs from a hip rafter to a valley rafter at 90º to the ridge.